Friday, August 10, 2012

Quiz Me Contest Part 1

ENTRY CLOSED.


So folks, I have been thinking, would it be fun to hold some sort of quiz game in my blog and for each quiz, a participant is able to win a small prize? Hell yeah, of course it would!

I will hold some games every now and then. Do take part and you might just win something! :)

To be eligible to participate in this game, you only have to be a Singaporean and have a Singapore local address. 

Here's how the quiz game works: I will post a question and you can e-mail to me your answers and also please include your name, residential address and contact number to h_m_tong@yahoo.com.sg 

Please indicate the subject matter in the e-mail as "Quiz Me" or else I shall treat it as spam mail, yes, I have lots of them.

Once the quiz has entered its closing date, I will let the winner know that he/she has won though SMS and I will send the prize either by mail (I really don't trust SingPost though) or by myself.

I will only pick one lucky winner for each quiz and the winner's post will be showcased in my blog.  

In the event that nobody has participated or all of the answers were undesirable, I will roll forward the prize to the next quiz.   

Excited? Here comes the question...

Which kind of bleeding is more life-threatening - Is it venous bleeding or arterial bleeding? What will the colour contrast of the blood be and why is it more life-threatening than the other? 

The closing date for this quiz is on the 31st of August 2012, 23:59hrs. 

A winner will be contacted through SMS within 3 days after the closing date.   

The prize for this quiz is... a small first-aid kit from Watsons! It's compact and you can carry it anywhere with you (except maybe in a plane due to liquids and aerosol regulations).

Items include: Antiseptic cream 10g, Plaster stripes x5, Absorbent cotton wool 5gm, W.O.W. bandage 5cm x 5.5cm, Adhesive roll plaster 1.25cm x 1m, Scissor, Medicated oil 3ml, Sterile wipes 2pcs, First-aid booklet, Usage card. 

Win me!!!
 Good luck! :)

Rapid Rescue App

The Singapore Red Cross has a downloadable app that allows people who are in distress and in need of first-aid attention to reach first-aiders who are within the vicinity. 

Do take note, this app is only for iphone users. So to all Android users, please be prepared to bleed to death, muahahahahaha!!! Nah, just kidding. They don't have it on Android yet. I hope someone makes one, because I am an Android user myself. 

Click on the link to the Singapore Red Cross website and it teaches you how to download and use the app - http://www.redcross.org.sg/articles/rapid-rescue-app

Emergency, Or Not?

Imagine one day when you are caught with a bad flu and you are feeling too weak to walk to a clinic or a hospital. You then decide to dial 995 for an emergency ambulance to take you there. 

Shortly after, you are transported to the ambulance from your home and you are on the way to the hospital. Concurrently, somewhere in Singapore, perhaps 10km away from where you are, a man is suffering from a heart-attack and his wife calls 995 for an emergency ambulance but he has got to wait because you took the last one.

Precious minutes wasted with the heart-attack victim laying on the ground. As a result, he died with the background music "25-minutes too late" playing. And of course, your ignorant self is unaware that the death of that poor bloke was indirectly caused by you when you were happily consulting the doctor regarding your flu. Perhaps you may feel a sense of guilt for the rest of your life when the 9.30pm news is on, or maybe not.

Misappropriate use of emergency ambulance could cost lives. So what determines an emergency situation, and what is not? 

The Singapore Civil Defense Force (S.C.D.F.) has come up with a guide to tell you just that. 

When to call for an emergency ambulance service?

The number in Singapore for emergency cases is 995. The only time you should dial that number is when:

  • Drowsiness or unconsciousness where the person cannot be roused.

  • Difficulty in breathing or chocking.

  •  Sudden or severe chest pain.

  •  Sudden or severe abdominal pain that will not go away.

  •  Dislocated or broken bones.

  •  Deep cuts or wounds with profuse bleeding.

  • Head injuries that are followed by drowsiness, vomiting, bleeding (from the ears, nose, or mouth) or unusual behaviour.

  •  Injuries to chest, abdomen, pelvis or spine (neck and backbone).

  •  Fall from heights.

  •  Poisoning e.g. inhalation of toxic gases or drug overdose resulting in unconsciousness and respiratory distress.

  •  Crushed injuries.

  •  Severe allergy.

  •  Drowning

  •  Burns and scalds - deep with white or charred skin or covering a large area bigger than the size of a hand, or covering the face.

  •  Any burns caused by electric shock or lightning.

What to do when you call for 995 for emergency ambulance service?

Once you have identified that the casualty's condition is life-threatening, dial 995 to reach the SCDF Emergency Ambulance Service. Remind yourself to stay calm because your rational actions might just save the casualty's life.

To facilitate a faster response to the casualty, you should do the following:

  •  Identify yourself and provide a telephone contact number.

  •  Provide the specific location of the casualty.

  •  Try to keep details to a minimum; describe the casualty's signs and symptoms briefly e.g. male, Chinese, age 67 years, having severe chest pain since 2 minutes ago, breathless sweating.

  •  If you do not know what to say, it will be more helpful for you to listen to the Control Room Operator and answer his questions as best as you can.

  •  Do not hang up until the Control Room Operator does so. He may need additional information or directions and may have some instructions for you to follow before the ambulance arrives.

  •  Send somebody to wait for the ambulance crew e.g. by holding the lift is necessary, and directing the ambulance crew to the casualty.

  •  Standby to assist if required.

Charges by Singapore Civil Defense Emergency Ambulance Service.

There is no charge for any emergency case that the SCDF emergency ambulance conveys to hospitals. However, the SCDF charges $180 for each non-emergency case that it ferries to hospital.

Note: The doctor at the Emergency Department of the receiving hospital will assess and determine the casualty's condition if it is emergency or non-emergency.

What is a non-emergency?

The number in Singapore for non-emergency cases is 1777.

A non-emergency does not end in death or serious complication if it is not treated immediately. These include one of the following: 

  • Toothache

  • Slight abdominal pain e.g. gastric. 

  • Slight fever, coughs and colds.

  •  Aches and pains which have been present for a long time.

  •  Minor bruises, slight cuts or broken skin.

  •  Slight burns or scalds.

  •  Mild vomiting, diarrhoea or constipation.

  •  Medical check-up or hospital follow-up.

When a case is non-emergency, the SCDF Emergency Ambulance Service should not be used. Instead, medical advice can be sought from a family doctor, or a hospital, using your own transport or the public transport system. Alternatively, dial 1777 for a non-emergency ambulance.

List of non-emergency private ambulance operators and charges.

Click here to view a list of private ambulance operators, their capabilities and basic charges.

Besides the basic charges, prices may vary from case-to-case. For instance, additional costs are imposed for the use of bandages, dressings, diapers, ect. Click here for more details.

Misconceptions on the use of emergency ambulance service.

995 is a free ambulance service?  Yes, the service is free only if it is  a true emergency. However, if a case attended to by the SCDF is deemed to be a non-emergency by its paramedics, the casualty will have to pay an ambulance fee of $180.

You can direct the ambulance to the hospital of your choice? No, the SCDF emergency ambulances will only convey casualties to the nearest designated restructured hospitals so that the casualty can receive immediate medical attention. This will also enable the ambulance to be available earlier for the next emergency call.

Casualty arrived by SCDF emergency ambulance will be given priority in treatment at the A&E Department? No, all casualties arriving at the A&E Department will be assessed by the medical staff at the hospital. Those assessed as critical will be attended first, followed by non-emergency cases.

Thursday, August 9, 2012

Wednesday, August 8, 2012

What Is A First-Aid Kit?

What is a First-Aid Kit(F.A.K.)?

It is important to have one first-aid kit on stand-by, ready to be used in times of need.

A first-aid kit is usually a compact, portable, and an organized pack that is well-stocked with supplies and equipment that can be used when required to aid a casualty.

Items in the kit should be checked on a regular basis to make sure that they are not expired.

Readily-packed kits can be easily purchased at any pharmacies. You can even customize it yourself according to your preference. You might want to add in a Blood Pressure Monitor Set to your F.A.K. especially when there are elderly folks at home.

A basic first-aid kit should be broken down into multiple categories for easy access and management. It should be customized and stored in such a way that it suits you and your family's convenience/needs when any of you are required to use the kit.

The categories are:

1. CPR and Personal Protective Equipment
2. Trauma Injuries
3. Instruments/Equipment
4. Topical Ointment
5. Symptomatic Relief

At the very least, your basic first-aid kit should include the following items:


By: Katrina Yi

Tuesday, August 7, 2012

Red Cross International Bazaar 2012


Date: 21 Oct 2012
Location: SCAPE (beside Orchard Cineleisure)
Time: 10am - 6pm
 

The Red Cross International Bazaar is the Society’s signature fundraising event to raise funds for its local humanitarian programmes to help the disabled, elderly, youth and the less fortunate in Singapore.
 
The bazaar brings together diplomatic missions and local enterprises in a dazzling 100-stall showcase with 100% of sales proceeds to the society’s humanitarian services.

Please join us by sponsoring and/or setting up a stall and give the local community the opportunity to experience and appreciate your country’s culture.

Contact:
Mr William Ng, Fundraising Department
Tel : 6664 0549 or email at william.ng@redcross.org.sg


Wound Management Part 2

In the last part of wound management, I am going to show you some of the different types of dressings, bandages and anti-infection products out there. I am also going to teach you how to use them.

But first, let us understand the topic of blood loss. 

Depending on body size, we have about 4 to 6 liters of blood in our body. Blood is vital because it carries oxygen and nutrients to our organs and tissues. Losing a certain amount of blood will cause critical and irreversible damage to the important organs, and that will spell certain doom. 

Bleeding rate varies according to the size and location of the wound. For example, someone may have a minor cut on their finger, which is a very common injury and it doesn't bleed much because only the capillaries (little, tiny blood vessels) are damaged.  Comparing to someone who gets a serious cut on the wrist where the radial artery is, that person might bleed to death in a few minutes if nothing is done.     

Let us have a look at how much blood we can afford to lose before we go into shock.

Amount loss: 500ml
Effects: Little or no effect. That is the typical amount of blood that blood donors have got to give. Some of them may feel dizzy after the donation, but nothing life-threatening will occur. But in an accident, the casualty may feel anxious and may panic as they have never encountered such amounts of blood loss before.

Amount loss: 1500ml to 2000ml
Effects: 

  • Casualty starts to go into hypovolumic shock (volume failure).

  • Casualty starts to perspire profusely. 

  • The brains start to produce adrenalin, causing pulse rate to increase. 

  • Blood channels from the skin and other none vital areas into the vital organs such as the heart, brains, lungs and kidneys, therefore, the skin becomes pale and the casualty feels cold. 

  • Rapid and shallow breathing.

  • The casualty feels dizzy and becomes confused.

  • Great sensation of thirst may also occur.    

Amount loss: More than 2000ml
Effects: The casualty starts to lose consciousness, pulse rate may become undetectable, breathing may stop, the heart stops beating. Imminent death. 

During a major arterial bleeding, it takes roughly 3 minutes before the casualty goes into shock. It is imperative for first-aiders to know what to do under such circumstances. We do not have time to panic and think. That is why regular practice is so important.

In the medical context, shock can be defined as the failure of the circulatory system to per-fuse blood into the tissues. It is not the kind of shock that horror movies give you. If your brains don't get the oxygen-carrying blood, your brains will die in 4 to 6 minutes. I have already helped you identify the classic signs of hypovolumic shock above. If you need that information again, be sure to look at the effects when you lose 1500ml - 2000ml of blood, highlighted in yellow.

Now, I am going to show you the different types of dressings, bandages and anti-infection products that I have with me. Do note that some of the things that I show you are not absolute must-haves, but it is good to have them at home. They also do not represent the entire range of products. There are many other products out there and many of them are readily available at the local pharmacies and hospitals in Singapore. It is also a good practice to check the expiry date of these products every year and be sure to re-stock them when they expire. 

Disclaimer: I do not represent any pharmaceutical companies or any entities. These opinions are solely my own. These products that I display are for educational purposes only. I am not selling or representing anything.  

Wound cleaning and disinfectants:

Do make sure that you or the person in your charge is not allergic to the product before applying it on the wound. Consult your pharmacist or doctor if you are unsure of allergic reactions or direction of use. When in doubt, do not use any. Often, clean water is the best solution to minor or medium-sized wounds.


Small iodine tubes. Good for small cuts and grazes. Fits perfectly in small first-aid kits. A good alternative when space is an issue. DO NOT apply on major wounds.


Bottle of iodine. Good for small cuts and grazes. Good for home use. DO NOT apply on major wounds. 


Antiseptic cream. Good for small cuts and grazes. Can be used for minor burns as well. 


Antiseptic cream. Good for small cuts and grazes. Can be used on minor burns as well.


Alcohol swabs. Good for small cuts and grazes. It can also be used to disinfect first-aid tools like twisters, shears, forceps ect. DO NOT use on deep cuts.


Iodine prep pads. Good for small cuts and grazes. DO NOT use on deep cuts.


Sterile wash. Good for small to medium-sized incise wounds. Good for minor lacerations. Good for small first-aid kits. DO NOT use on major wounds DO NOT inject it in yourself. It is used for irrigation only. 


0.9% Saline wash. Good for small to medium-sized incise wounds. Good for minor lacerations. Good for home use. DO NOT use on major wounds. DO NOT inject it in yourself. It is used for irrigation only.


Dressings:

Do make sure that all dressings used are sterile as they come in direct contact with the wound. Be sure to check if the dressing wrapper is torn or broken before purchasing.


The most commonly used first-aid product. A plaster is an adhesive bandage with a small sterile dressing in the middle. It is good to keep a pack of plasters with different sizes at home. This is used for 90% of home and outdoor injuries.


Sterile 4x4 pad. Good for minor wounds. It can also be used to dry the wound after washing. Use bigger pads for bigger wounds. Good for home and outdoor use.


Changing of dressing can be a painful affair sometimes because blood coagulates and sticks to the dressing. You may risk tearing tissues while changing pads. Melolin is a low adherent pad that doesn't stick onto the wound.


Jelonet is coated with paraffin jelly that smooths and protects wounds and reduces the risk of dressing sticking onto the wound. You can use antiseptic creams before applying Jelonet, and then use a gauze pad to cover it up.


Another non-stick pad that is good for joint areas such as the knee or elbow. It works like a plaster and it is water-proof. So you can take a shower with Opsite Post-Op pasted on your injury.


Tegaderm + Pad is a quick fix for small wounds. It has a non-adherent pad. It can also be use over a gauze pad and stick it in place when bandage is not available. You can bathe with that on, no problem. Comes in different sizes.


Bandages:

Bandages are used to secure and hold the dressing in place. DO NOT apply bandages directly to the wound area as it is not made to be sterile most of the time.


This is an interesting product. Surgifix is a netted bandage. The stretchable netting holds the pad in place. The nettings are made dedicated to individual areas - Elbow, knee, feet, head, thigh, shoulder ect.   


Conforming bandage is a tradition bandage used for supporting the dressing on the wound. Conforming bandages have high stretchability and is able to conform to joints well, hence the name.


Elastic crepe bandage. Usually this is used to compress sprains. But when conforming bandage is not available, this is the closest thing you could use.


Triangular bandages are used for many things. It can be used as an arm sling, elevated sling, tourniquet, securing splints for fractures, and a bandage to secure dressings.


Other essentials:  

These are items that are good to have as well.  

Nitrile gloves. Remember, you want to protect yourself and your casualty by avoiding cross-contamination. Never use latex gloves as the casualty may be allergic to the material.   


Sterile cotton balls are good when you want to apply lotions onto the wound area. However, DO NOT embed cotton balls into wounds.


Sterile dressing set, when you have the time and luxury to clean small wounds. They are affordable, price ranges from $1.60 to $2.70 a piece. Good to stock some at home.


Cold compress. Very good for bruises (sprains and fevers as well). Comes in 2 packs per box.


Now, let's learn how to treat certain wounds.

Contusions (bruises):

Let's simulate a large bruise on the left knee. How do we treat a bruise? As with all bruises, you need to remember a couple of key points - DO NOT rub and DO NOT apply heat.


Step 1: Elevate the injured leg for awhile so that it's a little harder for blood to go to the leg. It reduces swelling that way.


Step 2: Take a pack of instant cold compress and squeeze it at the instructed area. Remember to give it a few good shakes after squeezing to mix the contends for maximum endothermic reaction.


Step 3: Once you feel that the pack is cold in your hand, firmly apply it on the bruising knee. DO NOT RUB. Compress your knee with the cold pack for 10 minutes, then release for 1 minute, and then continue the cycle for an hour. If the pack is no longer cold, change to a new one.

In an event whereby you do not have an instant cold compress pack, you can improvise. 


Step 1: Fetch roughly 400ml of clean water.


Step 2: Add ice-cubes into the water.


Step 3: Wait for the water to chill and then dip a clean cloth into the icy water.


Step 4: Wring the excess water out of the cloth.


Step 5: Fold it and compress firmly onto your bruising knee. DO NOT RUB. Repeat the cycle by dipping the cloth into the icy water again when the cloth loses its cool.

There you have it, the easy steps for treating a contusion. You can also do that to other parts of your body that is suffering from a bruise. However, there might by other underlying problems if you encounter excessive bruising. It could be a minor fracture or some blood disorder. Go consult a doctor if bruising is too severe. 


Abrasions (grazes):

Let's simulate an abrasion to the right hand because your tried to break your fall when you tripped over.

I really want to stress one important thing at this point of time. Please remember to ALWAYS WEAR GLOVES before treating open wounds, even on yourself. You really want to avoid cross-contamination.

Ideally, we should use a conforming bandage as our choice of bandage. But for this demonstration, I am going to use an elastic crepe bandage as it is easier to roll it back into its packaged form and keep it for my other demonstrations. And the assistant in this tutorial is my mum. My grandma, who is the original assistant, has taken ill. So I will just let her rest. 


Step 1: Rinse hand thoroughly with clean water. Make sure that all dirt and debris embedded are washed away.  


Step 2: Always wear gloves when treating open wounds, even on yourself. Remember to wear non-latex gloves as some people are allergic to latex. If you are treating a casualty with multiple wounds, always change gloves when you are moving from one wound to the next. Same for multiple casualties, change gloves when you are moving from one casualty to the next.


Step 3: Lightly tap the hand dry with sterile gauze swabs. DO NOT RUB on wound area. Throw it away after use, DO NOT REUSE AS DRESSING.


Step 4 (optional): If the casualty is not allergic to any solutions, apply iodine solution on the wound with sterile cotton ball. If in doubt of allergies, DO NOT APPLY ANYTHING.


Step 5: Apply a clean gauze pad as a dressing over the wound.


Step 6: Ask the casualty to apply direct pressure with their own hand to stop blood flow. It also frees up your hands to do other important things.


Step 7: Secure the dressing with medical tape on one side and on the parallel side.


Step 8: Use a conforming bandage and wrap two rounds around the wrist to anchor the bandage in place. Just wrap firmly but not tightly, you don't want to accidentally constrict blood flow to the hand. Always ask the casualty if it's too tight for their comfort.


Step 9: After anchoring the bandage at the wrist, come down diagonally next to the pinky finger.


Step 10: Go under the hand from the pinky finger and come up over the palm, making a figure-8 pattern. When you consecutively do steps 9 and 10, make sure you "fan out" the bandage by covering 2/3 of the previous layer, while leaving 1/3 as the new layer. Continue doing steps 9 and 10 until the dressing completely disappears under the bandage. 


Step 11: Once you are done, go round the wrist twice to secure the bandage. Lastly, cut any excess bandage away and secure it with medical tape at the end of the line.


It should look like that once you are done.


Now let me teach you how to remove gloves after you are done treating wounds. 

Step 1: Start by pulling one glove out from the fingers' portion.


Step 2: Once the glove  has come off from one hand. Hold it with your other gloved hand.


Step 3: Pinch the portion at your wrist and remove from inside-out.


If done properly, one used glove should be inside, and the other glove that had come in contact with your skin should be facing out. Dispose the gloves appropriately.

Remember to always wash your hands with soap after treating wounds.


Incised wounds and lacerations:

I am going to teach you how to apply a dressing and do simple bandaging on various areas of the body.

Let's simulate an incised wound or a laceration on the lower arm. I was planning to use Gory for this, but I think certain parts of Gory is made of latex, which my mum is unfortunately allergic to. 

In the following pictures, you will not see me in gloves because I have unwittingly thrown away the previous pair of gloves and now I have only 2 pairs left. I want to leave those 2 pairs untouched for real situations. I know that's not enough. I will stock up on more tomorrow. And since this is a mock situation, I will leave my hands without gloves. YOU SHOULD ALWAYS WEAR IT WHEN TREATING  REAL OPEN WOUNDS!! 

Before I start, I would like to list down some important S.O.P.s (Standard Operation Procedures) so that I don't have to constantly repeat and make myself look like a parrot. 

S.O.P.s whenever you or others have an open wound - 1) Wash wound with clean water, 2) Wear a pair of non-latex gloves, 3) Tap the wound dry with sterile gauze swabs.

DO NOT USE IODINE SOLUTION ON ANY LARGE OR DEEP OPEN WOUNDS.  

After the S.O.P.s have been done, I am going to show you how to dress and bandage the lower arm now. 


Place sterile dressing on the lower arm.


Tell casualty to apply pressure on the wound to stop the bleeding while you start applying a bandage. Start anchoring the bandage by going 2 rounds around the wrist. 


Then slowly work your way up, fanning out the bandage by covering 2/3 of the previous layer, while leaving 1/3 as the new layer.


Fanning out the bandage by covering 2/3 of the previous layer, while leaving 1/3 as the new layer. Make sure that the bandage does not constrict blood flow. Ask the casualty if it's too tight for them.


Make 2 rounds below the elbow level to secure the bandage in place.


Give the leftover bandage a few good twists before tucking it in.


Or you can use that clip thingy to secure the ends.


Lastly, tell the casualty to apply direct pressure to the wound area for half-an-hour, and elevate the arm above the heart level.

You have seen how to dress and bandage the lower arm. You can also use the same technique for other extremities such as the upper arms, thighs, and lower legs (sheen and splint areas). 

Sometimes, the casualty may become tired when they elevate their arm for too long. In this scenario, I am going to teach you how to do an elevation sling with a triangular bandage. It is best used to control the bleeding of the lower arm. 

First, let us look at the workings of a triangular bandage...

Don't worry, there is no maths involved . You don't need to find any angles or remember 1/2 x base x height is a formula to find the area of a triangle.

Now I will show you how to do an elevation sling. Please use the above diagram for orientation purpose.


Step 1: Tell the casualty to place their injured hand on their clavicle bone (collar bone).
   
Step 2: Point and place the apex on the injured side of the arm. Make sure that the apex side covers at least half of the upper arm. Leave one end over the shoulder of the uninjured arm, be sure that it's just a little over the shoulder, not too much or else you will find it difficult to secure the sling later on. Leave the other end pointing at the ground.

Step 3: Start to tuck in the base of the triangular bandage from the palm all the way to the elbow. Be careful if you are a male first-aider trying to help a female casualty. You may accidentally brush against her sensitive area and it is highly possible that she might give you a slap. Don't end up needing first-aid yourself.

Step 4: When you are done tucking in the base, it should look like this. Leave the thumb out.

Step 5: Hold both the outer base and the tucked in base parallel to each other.

Step 6: Start to twist in one direction. Do twist it firmly so that the injured arm can sit securely without swinging about. 

Step 7: When you have twisted to area that is near the casualty's back, stop.

Step 8: Bring the untwisted piece under the shoulder blade of the injured side and then finally go across both the shoulder blades.

Step 9: Start to secure the bandage by tying a knot at the uninjured side of the shoulder.
 
Step 10: Tie another knot.

Step 11: Do a little "house-keeping" by tucking in the tied knots under.

When you are done, the front should look like that. Leave the thumb out to check for circulation by the capillary refill method. To do that, gently press on the casualty's thumb to see if it comes back to a pinkish-red colour in less than 2 seconds. If it takes 2 seconds or more, that means circulation is poor and you will need to redo the entire bandage. 

When you are done, the back should look like that. If you find it difficult to tie the knot from the side on the shoulder because the casualty is big-sized, you can do it at the back, too.

There you have it, an elevation sling. There are a few considerations to take note of. If there's heavy bleeding and direct pressure and elevation doesn't work, try to use indirect pressure by pressing hardly onto the pressure points. Then quickly get someone or yourself to call 995 for an ambulance. I am going to show you the two important pressure points you will get to learn at the Singapore Red Cross.

The Brachial pressure point which is below the armpit.

The Femoral pressure point which is on the thigh.
You may be interested in other major pressure points as well.
  
Now let's move on to head injuries. Be sure to check for skull fractures before you apply a dressing and a bandage. Make sure that no part of the head has an indentation or other anomalies by softly touching and feeling for them. You can also detect it visually to see if there is a white liquid called Cerebralspinal Fluid flowing out from the nose and ears, it's normally an indicator that there is a fracture at the base of the skull. If that happens, do not move the casualty (unless in immediate danger), do not give any food or drink, and call 995 for an ambulance immediately. 

As usual, carry out the S.O.P.s and then follow the illustrations below.

Step 1: Place a gauze pad where the injured area is.

Step 2: Start to apply a conforming bandage over the dressing. 7.5cm x 4m is a suitable bandage size for the head.

Step 3: Go 3 to 4 rounds vertically around the head. Be mindful not to cover the ears.

Step 4: Then go 2 rounds horizontally around the forehead to anchor the bandage in place.

Step 5: Tuck in any left-over bandage to secure it in place.

It should look like that once you are done.

 Now let's simulate a cut to the eye lid. How do we deal with that?

S.O.P.s first, and then follow the illustrations below.


Step 1: Apply a gauze pad as such. You can either ask the casualty to hold the pad or use medical tape to secure it in place.


Step 2: Anchor the bandage by going 2 rounds horizontally across the forehead.


Step 3: Then come under the ear and move diagonally up. Make sure you do not cover the ear.


Step 4: Do that until you cover the pad entirely.


Step 5: Tuck in any left-overs.

The front should look like that when you are done.

The side should look like that when you are done.


Avulsions ( dangling tissues): 

If it's a minor wound, just flick the dangling skin tissue back in. It's good to do that because it acts as a natural dressing for the wound. After that, you can use the same dressing and bandaging techniques taught under incised/laceration wounds. If it's a major avulsion, flick the dangling tissue back in, control the bleeding by elevation and direct or indirect pressure, and call 995 immediately.

Puncture wounds:

Sometimes we do get splinters embedded into our skin. Sometimes a child may occasionally get a staple into his finger. Those are very small objects which you can pull out without any worries. But you DO NOT REMOVE larger objects such as knives, scissors, broken glass, or anything sharp and long that impales through the skin. I will give you 2 reasons why you shouldn't do that:

1) When an object impales through the skin; capillaries, arteries, and veins may be broken. However, it does not bleed as much because the object is in there to control the bleeding. Once you pull that out, it's like suddenly taking away a dam and watching water crash down in huge volumes. 

2) When you remove the object from a punctured wound, surgeons will have a hard time pin-pointing how deep the puncture is.

If you have a triangular bandage with you, then use it to make a ring pad and secure the penetrating object in place so that it doesn't move and cause further damage. If you don't have one, then make sure you and the casualty do not touch the object and call 995 immediately.

It's fairly difficult for me to show you in pictures, therefore, I will let this expert teach you how to make a ring pad in this video.

Once you are done making the ring pad, place it around the object and tie the pad down with a bandage. DO NOT tie on the object. You will risk pushing the object deeper. For humour's sake, I shall "impale" myself with a test tube and show you where to place the pad and how to bandage it.


Secure the object with a ring pad.


Secure the ring pad with a bandage. DO NOT bandage on the object.


Top view of the ring pad with bandage.


Amputations:

This is really rare, but if it happens, please remember what to do and try not to panic because amputations can and will cause casualties to lose a lot of blood, which ultimately leads to shock, and then finally death occurs.

The first thing to do is to check for danger, just like any other cases before rendering first-aid. The normal S.O.P.s with the EXCEPTION of WEARING GLOVES do not apply here anymore. You do not need to wash the wound because the blood is doing that already. You also do not need to tap the wound dry. 

In the second phase, there are two things you must do, and probably the most important things to do are to get someone to call for an ambulance and to stop the bleeding. If there are small body parts such as the tip of the finger that comes off or toes that come off, the bleeding is still manageable.

However, if we are talking about large extremities such as the entire lower limb, direct pressure just wouldn't cut it at this point of time, and indirect pressure points can do little.

What I am going to show you next is a controversy that is not taught by the Singapore Red Cross. Please do not use this technique unless it is the only last resort, knowing that the casualty will die if you do not do it. You will be liable for law suits if you step out of your boundary as a first-aider. So full discretion is strongly advised. 

That controversial technique is known as a tourniquet. The reason it is not taught to first-aiders is because we may mistaken a small blood loss from a cut for a major, life-threatening one. Some first-aiders then panic and start to apply a tourniquet. A tourniquet, when applied correctly, causes blood to stop flowing to a certain area. When tissues are deprived of oxygen-rich blood, the cells start to die. That is known as tissue necrosis. Do watch this video to learn what a tourniquet is about and how to properly use one.


If you are able to stop the bleeding, then the next thing to do is to try to salvage the body part. You got to do this quick because after a certain time-frame, the body part cannot be reattached anymore. I will teach you how to do that.


Let's treat this lighter as a severed finger.

Step 1: Grab a plastic bag and put ice cubes in it.

Try to be generous with the ice.

Step 2: Grab another plastic bag to put the severed finger in.

Make sure the bag which the finger will be in is dry.

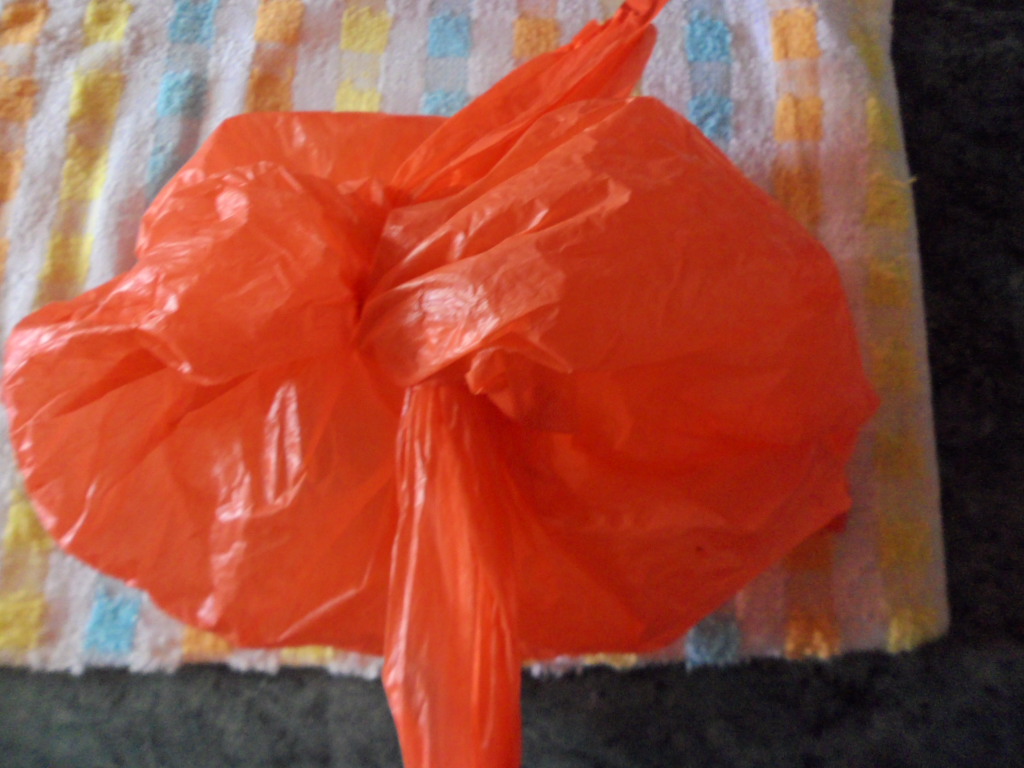
Step 3: Tie the plastic bag with the severed finger in it.

Step 4: Place the bag with the finger inside the bag of ice.

Step 5: Lastly, tie the bag, return to look after the casualty, and wait for the ambulance to arrive. Remember to pass this bag to the paramedics when they arrive, they will know what to do with it.

 
That is all I have to offer for amputations. 

Healing:

After all that damage and repairs we have seen, some of you might be curious to know how our wounds heal naturally. 
  
1) When you suffer from a cut, platelets from the blood will begin forming a clot. 

2) The tissue-building cells known as Fibroblast then migrate to the injury site to start repairs.

3) A plug of fibrous tissue is formed within the clot. The plug solidifies to form a scab that will eventually fall off from the skin when the injury is healed from the bottom-up.


Conclusion:

All right folks, that is all I have for wound management. If you have any questions or suggestions, please do not hesitate to write to me. You can do that either through this post or e-mail me at h_m_tong@yahoo.com.sg 

If I think your question or suggestion is interesting, I will post it in my next entry to create more awareness to the public. Thank you.